well, I will write a quick tutorial about tilt shift effect and how you make it in photoshop
first for this how don't know what is tilt shift:
"Tilt–shift photography is the use of camera movements on small- and medium-format cameras, and sometimes specifically refers to the use of tilt for selective focus, often for simulating a miniature scene. Sometimes the term is used when the large depth of field is simulated with digital post-processing; the name may derive from the tilt–shift lens normally required when the effect is produced optically." (taken from Wikipedia)
you can find many photos that was taken using this technique
it gives you the ability to play with the focus and to brake some optical laws of physics, It a lot of fun, it give another point of view on the space we living in but as you read in wiki or you know, you need an expensive lens for this kind of photos
but you can use photoshop to get the same effect and without buying an expensive equipment
because you going to photoshop the effect not all the photos will fit for this (after all we cant really copy the physics of the lens)
but still you can copy this technique on some of your photos
and this how you chose the photo.
* the photo should be deep (landscape, Cityscape etc.)
* the photo should be clean, without many objects that disturb the photo (better to search for photo with horizontal objects and not vertical like skyscrapers)
* the focused area also should be clean of extra objects
* the photo need to be taken from above (so it look more like a miniature after the editing)
* the photo should have 3 parts,
- the front that should be unfocused
- the middle , the main object
- the background that is also unfocused
for the editing I chose this photo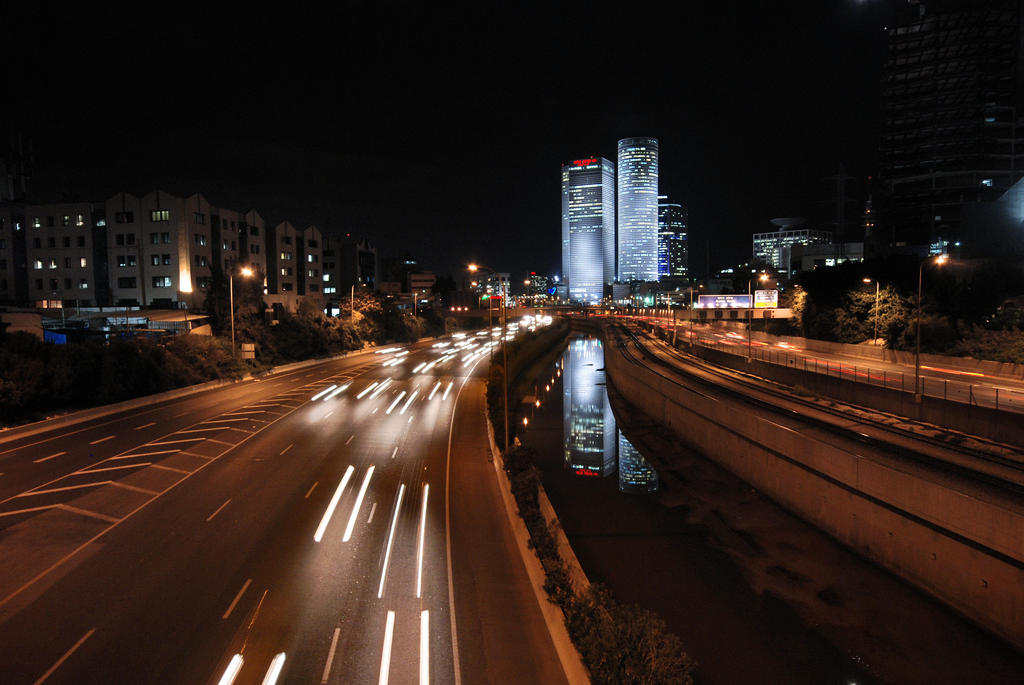
open the photo in photoshop

select quick mask or press Q
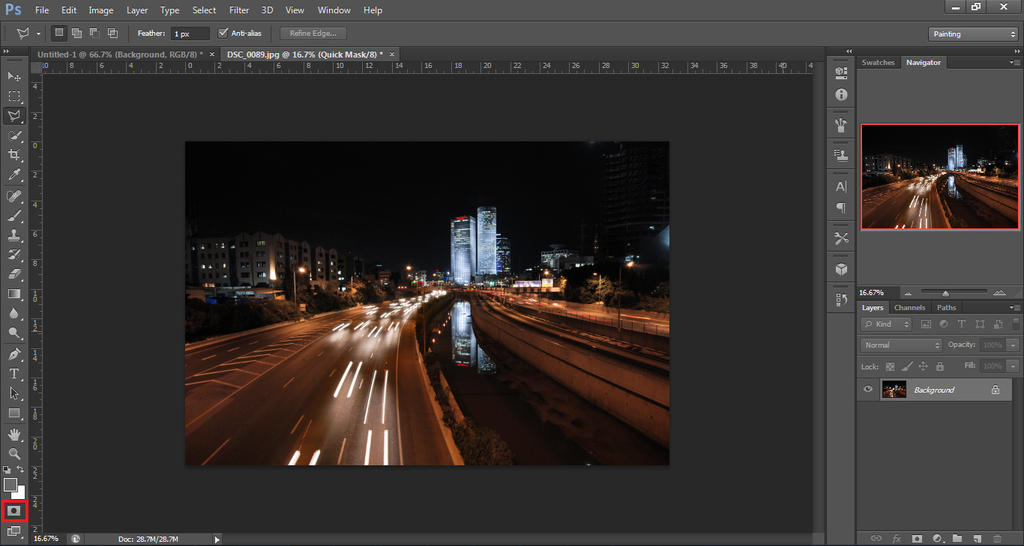
select gradient tool or press G

chose reflected gradient or navigat using [ ]

decrease the range of the gradient
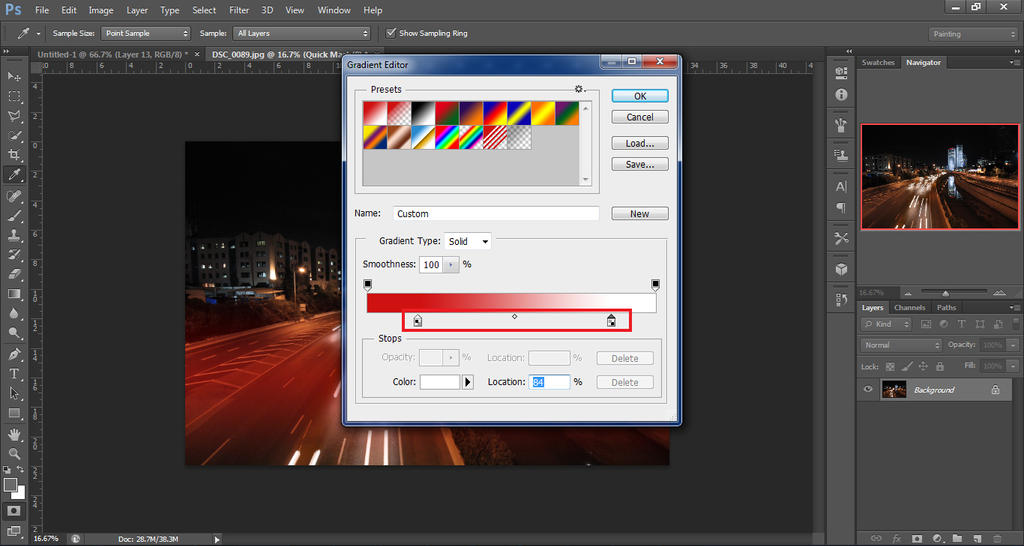
use the gradient to mark the focused area
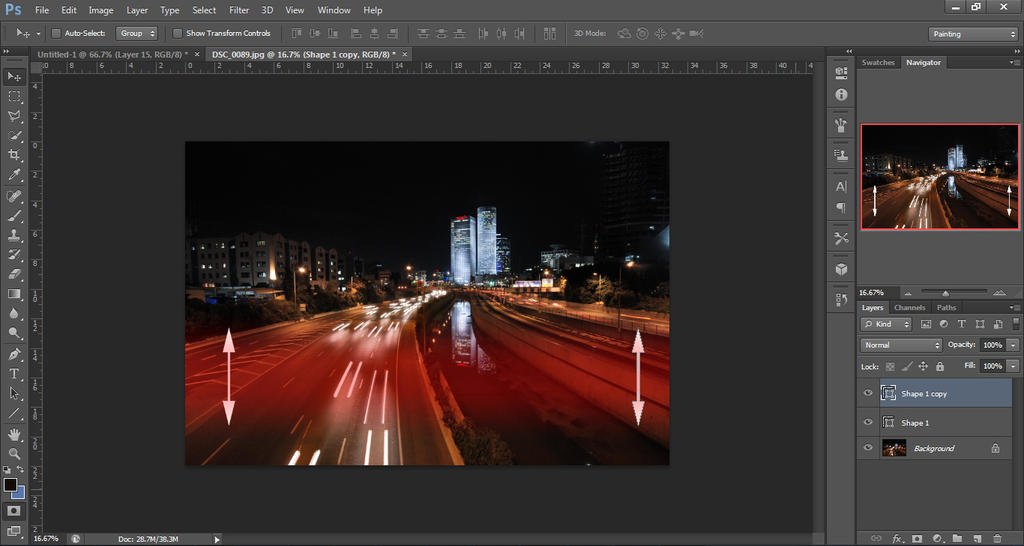
prees Q again to select the area

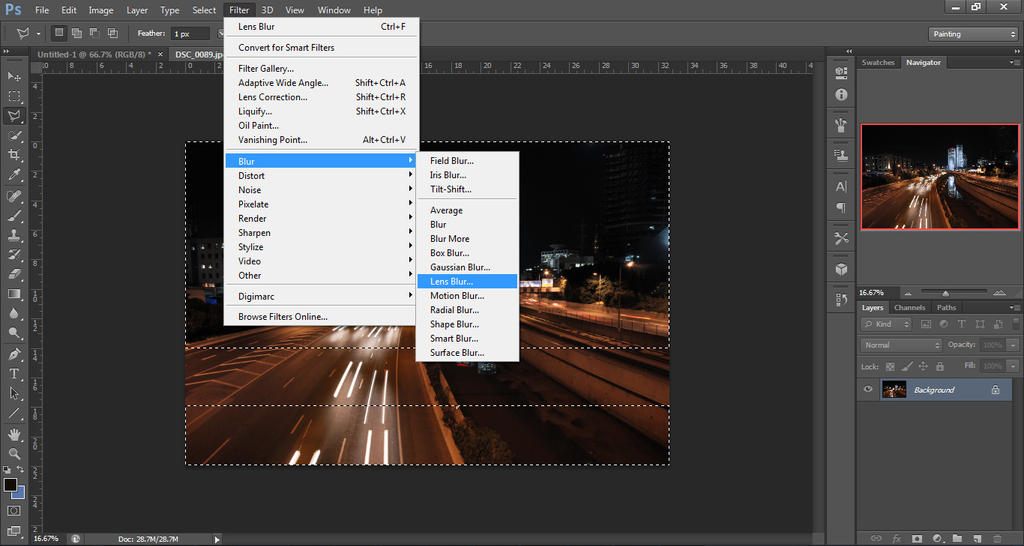
go to fillter ->Blur -> Lens Blur
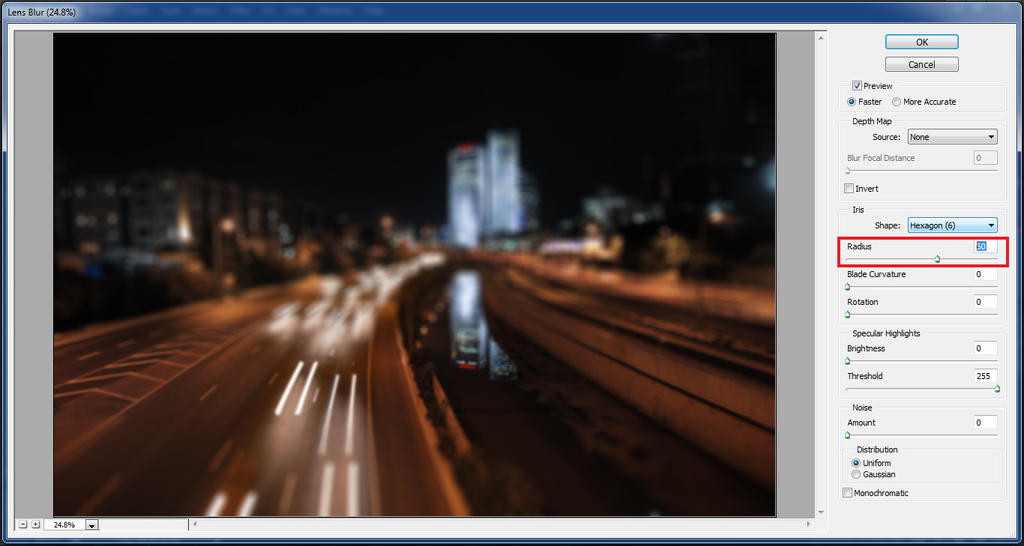
play with the Radius to get the amount of blueness you want
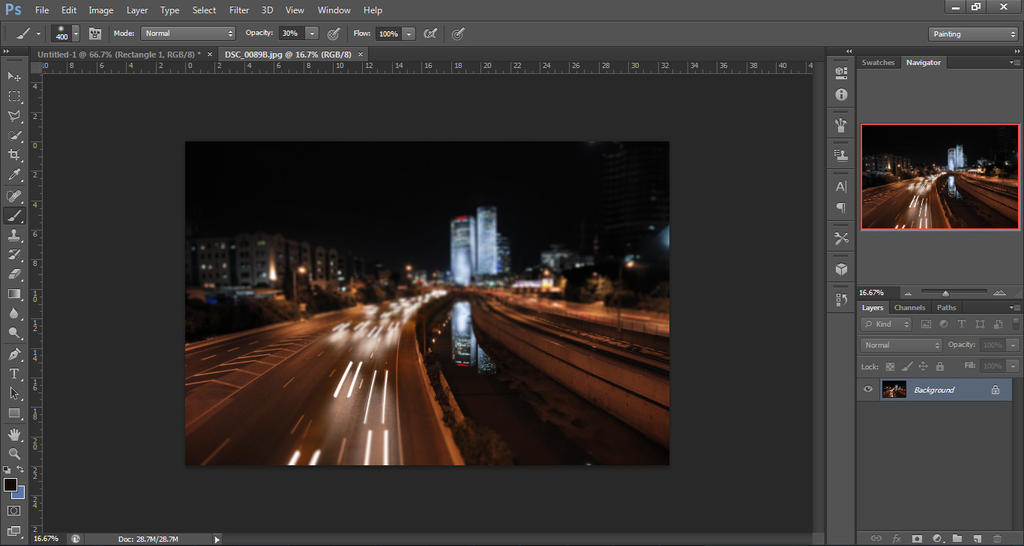
well, that done, now only final touches and that it
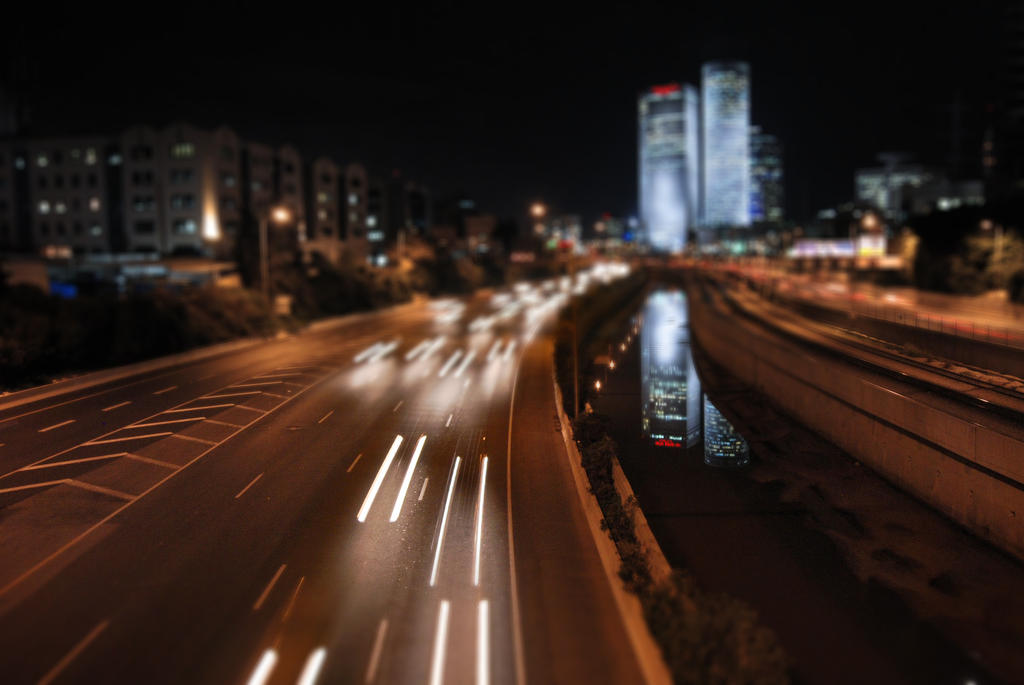
and that the final result
hope that this tutorial was useful for you
if you have something to say or advice (also spelling mistakes) you will be welcome
first for this how don't know what is tilt shift:
"Tilt–shift photography is the use of camera movements on small- and medium-format cameras, and sometimes specifically refers to the use of tilt for selective focus, often for simulating a miniature scene. Sometimes the term is used when the large depth of field is simulated with digital post-processing; the name may derive from the tilt–shift lens normally required when the effect is produced optically." (taken from Wikipedia)
you can find many photos that was taken using this technique
it gives you the ability to play with the focus and to brake some optical laws of physics, It a lot of fun, it give another point of view on the space we living in but as you read in wiki or you know, you need an expensive lens for this kind of photos
but you can use photoshop to get the same effect and without buying an expensive equipment
because you going to photoshop the effect not all the photos will fit for this (after all we cant really copy the physics of the lens)
but still you can copy this technique on some of your photos
and this how you chose the photo.
* the photo should be deep (landscape, Cityscape etc.)
* the photo should be clean, without many objects that disturb the photo (better to search for photo with horizontal objects and not vertical like skyscrapers)
* the focused area also should be clean of extra objects
* the photo need to be taken from above (so it look more like a miniature after the editing)
* the photo should have 3 parts,
- the front that should be unfocused
- the middle , the main object
- the background that is also unfocused
for the editing I chose this photo

open the photo in photoshop

select quick mask or press Q

select gradient tool or press G

chose reflected gradient or navigat using [ ]

decrease the range of the gradient

use the gradient to mark the focused area

prees Q again to select the area

go to fillter ->Blur -> Lens Blur

play with the Radius to get the amount of blueness you want

well, that done, now only final touches and that it

and that the final result

hope that this tutorial was useful for you
if you have something to say or advice (also spelling mistakes) you will be welcome
No comments:
Post a Comment